Quickstart#
Set up rigorous and repeatable model testing in minutes.
In this quickstart guide, we will use the 300 Faces In the Wild (300-W)
example dataset to demonstrate test data curation and model evaluation in Kolena, using both the web app and
the kolena Python SDK.
Using the SDK
If you would like to use the SDK for this quickstart follow these instructions to set up the SDK and set up the code example locally.
First, install the kolena python SDK:
Then, clone the example code:
The kolenaIO/kolena repository contains a number of example integrations to clone and run directly. Set up the keypoint detection example for this quickstart:
Step 1: Upload Dataset#
Model evaluations on Kolena starts with datasets. Datasets are tables that contain the data you wish to use for creating test cases.
To get started, navigate to kolena.com and
click Import Dataset then Select From Cloud Storage.
Using the explorer, navigate to s3://kolena-public-examples/300-W/ and select 300-W.csv.
Generating Datasets
See the keypoint_detection/upload_dataset.py
script in the code example for details on how the dataset was generated.
The keypoints in 300-W.csv have been defined using kolena.annotation.Keypoints from
the kolena SDK.
See the keypoint_detection/upload_dataset.py
script for example usage.
You will now see a preview of how the information is going to be consumed by Kolena.
Give your dataset a name and select locator as the ID field. The ID field uniquely identifies a datapoint
and is used when uploading model results to associate results with datapoints.
Click Import to create the dataset. Once the import has completed,
you can add descriptions and tags to organize your datasets.
The example code contains a script keypoint_detection/upload_dataset.py
which will process the CSV file s3://kolena-public-examples/300-W/raw/300-W.csv
and register it as a dataset in Kolena using the register_dataset function.
First, let's first configure our environment by populating the KOLENA_TOKEN
environment variable. Visit the
Developer page to
generate an API token and copy and paste the code snippet into your environment:
We can now register a new dataset using the provided script:
After this script has completed, a new dataset named 300-W will be created, which you can
see in
Datasets.
Step 2: Upload Model Results#
Model results are supplied as tables containing the ID field chosen when uploading the dataset. For
this example, we will upload the results for the open-source
RetinaFace (RetinaFace option)
keypoint detection model and a random keypoint model.
To upload new model results, from the Details tab of the dataset, click on Upload Model Results in the upper right.
Then, select Upload From Cloud Storage. Using the explorer, navigate to s3://kolena-public-examples/300-W/results/
and select random.csv. This CSV file contains model results for the random keypoints
model for each of the datapoints we uploaded to the dataset.
Generating Model Results
See the keypoint_detection/upload_results.py
script in the code example for details on how results were generated.
You will now see a preview of how Kolena will ingest the model results. Give your model a name, and click Import to
upload the model results.
Repeat the above steps with the file retinaface.csv.
The example code contains a script keypoint_detection/upload_results.py
which will compute metrics on a CSV of model results and upload them to Kolena.
poetry run python3 keypoint_detection/upload_results.py RetinaFace
poetry run python3 keypoint_detection/upload_results.py random
Results for two models named RetinaFace and random should now appear
Step 3: Explore Data and Results#
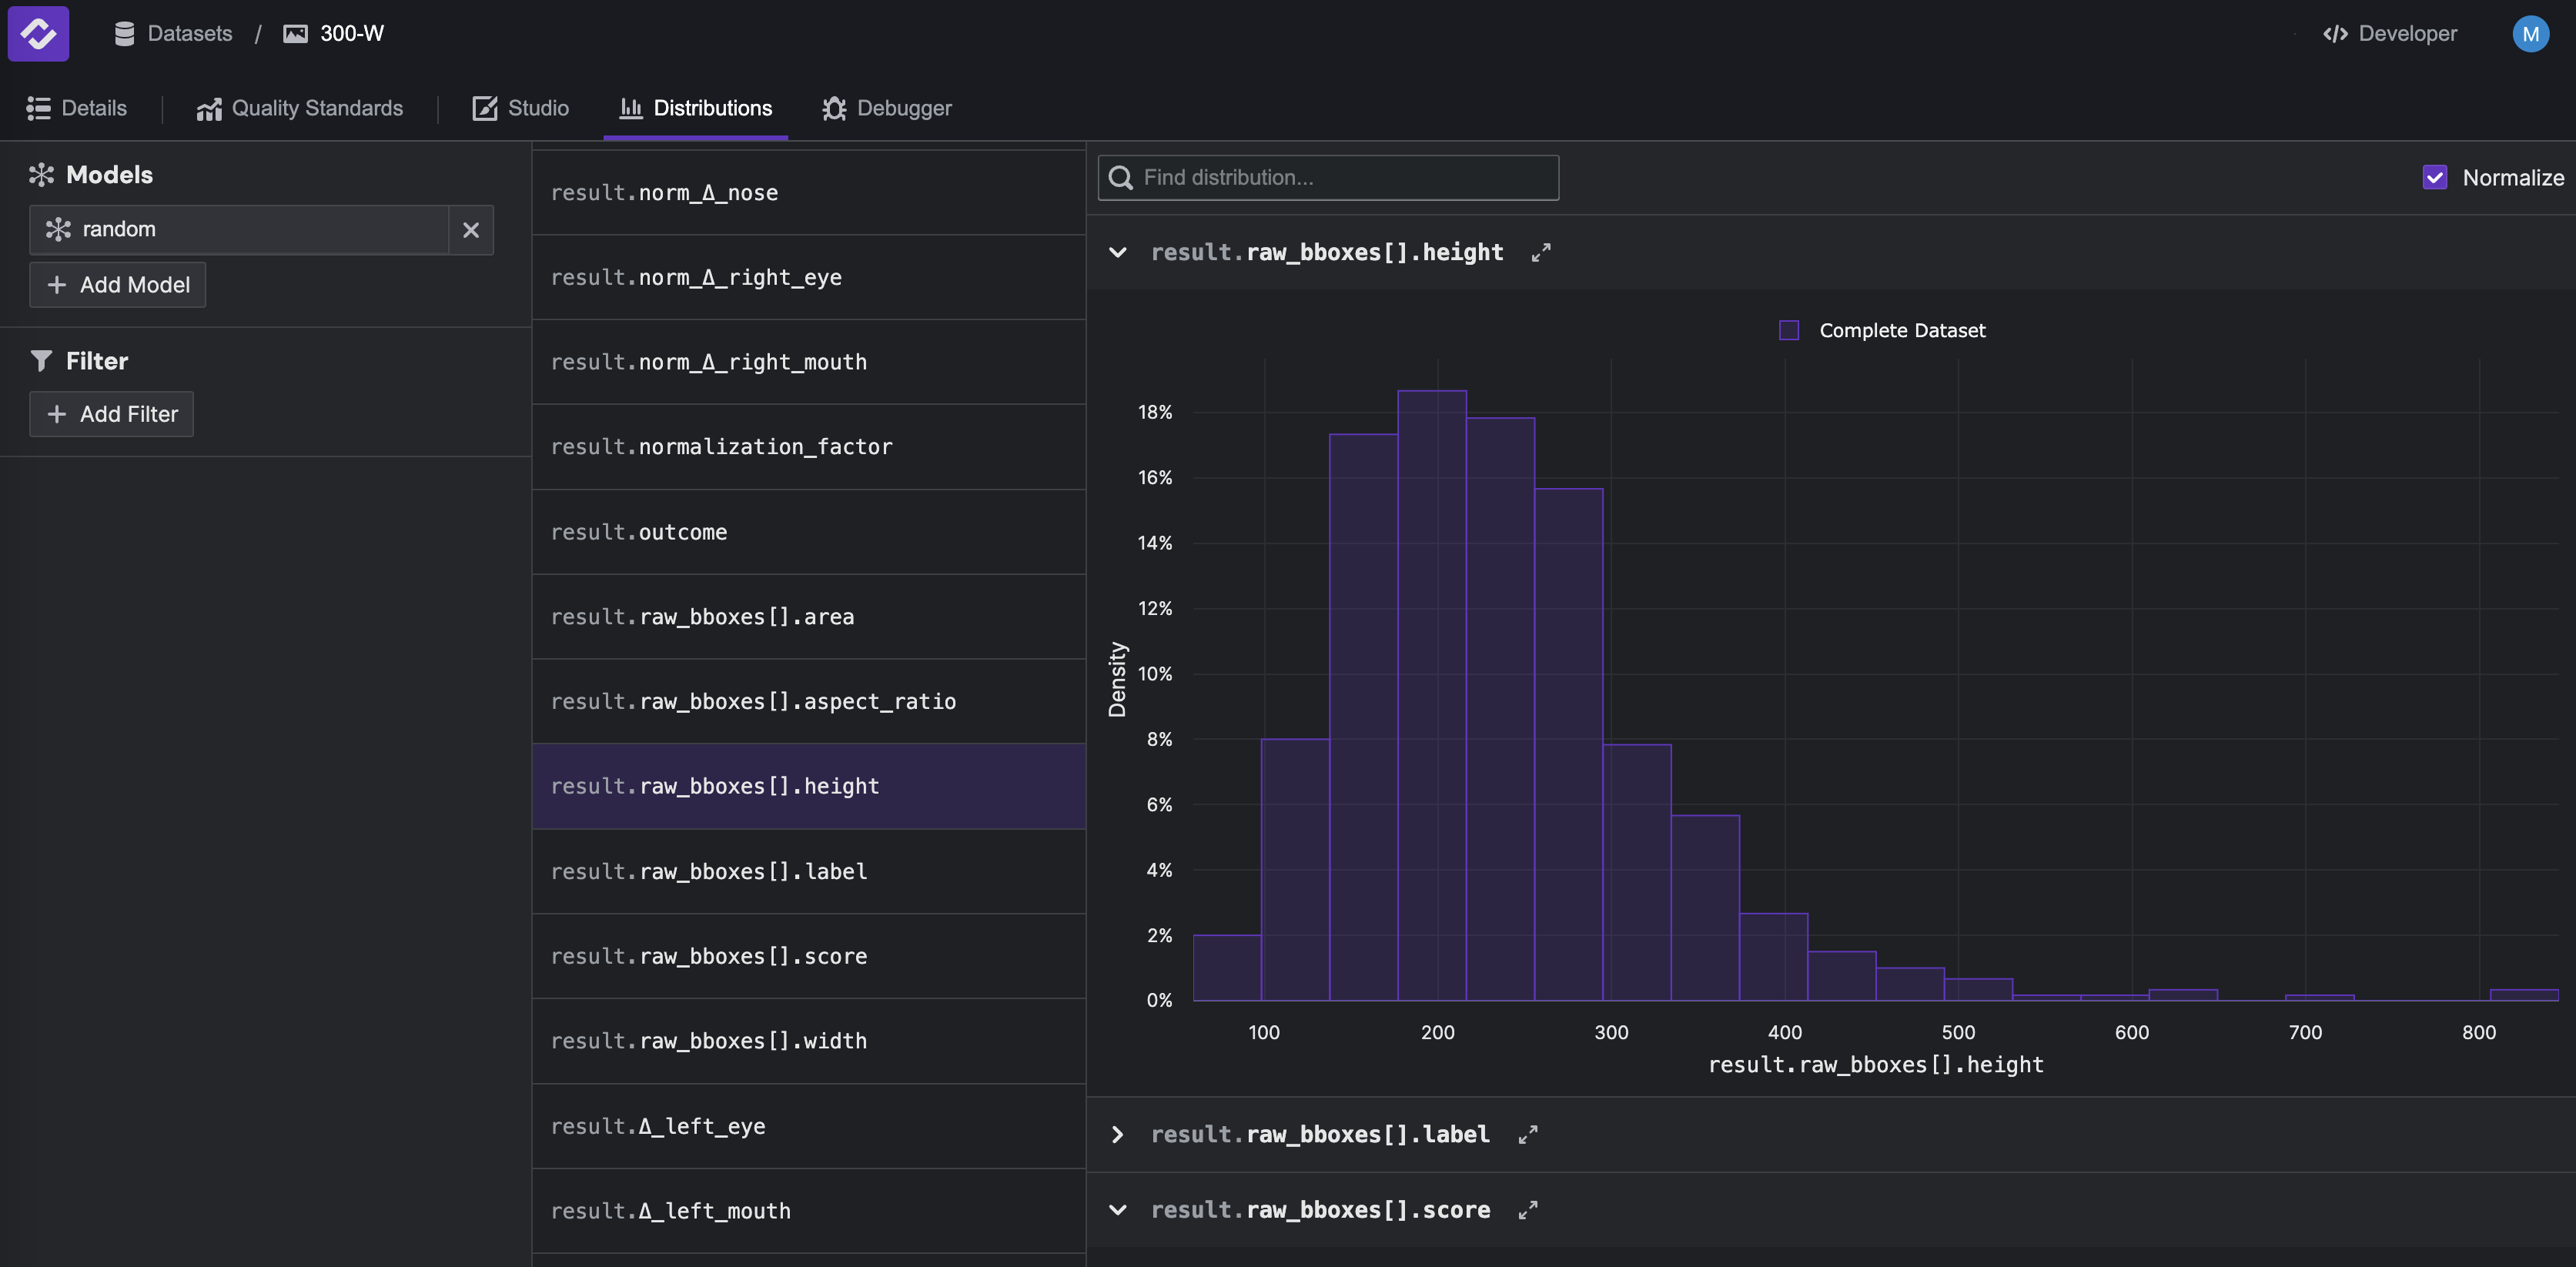
Once you have uploaded your dataset and model results, you can visualize the data using Kolena’s plotting tools.
You can quickly see the distribution of any datapoint or model results field in the Distributions tab.
Additionally, you can create custom plots in the Debugger tab. For example, click Add Model in the top left and
select the random model. In the plotting widget at the bottom, select datapoint.normalization_factor as the x-axis
and result.mse > mean as the y-axis to plot these two fields against each other.

Step 4: Define Quality Standards#
Quality Standards define the criteria by which models are evaluated on each dataset. A Quality Standard consists of Test Cases, which organize your data into key scenarios, and Metrics, which define key performance indicators.
Define Test Cases#
To configure test cases, navigate to the Quality Standards tab and click on Divide Dataset By. Select
datapoint.condition to create test cases based on the condition field. Click the check mark to
save your test cases to your Quality Standard.
You will now see that your dataset has been organized into test cases based on the category field. Any Metrics you define will be calculated on each test case.

Define Metrics#
To configure Metrics, from the Quality Standards tab, click Define Metrics and select result.mse > mean.
Rename the metric to Average MSE, and select Lower is better as the highlight.
Repeat these steps for result.nmse > mean.
Step 5: Compare Models#
Once you have configured a Quality Standard, the Metrics you define will be calculated across all Test Cases.
To compare the results across models, navigate to the Quality Standards tab and add random model to the
table using the Add Models button in the top right. Then, add the RetinaFace model to compare its performance
to the random model.
You will now see all metrics in the Quality Standard computed on every test case in the Quality Standard. Metrics in this view will also be highlighted according to how much they improve/worsen compared to the reference model. In this example, RetinaFace performs better than the random model over the entire dataset as well as over all test cases we defined earlier.
Conclusion#
In this quickstart, we used an example integration from kolenaIO/kolena to integrate data from the 300 Faces In the Wild (300-W) dataset, created test cases, and tested the open-source RetinaFace keypoint detection model.
This example shows us how to quickly and easily integrate test data and evaluate model performance in Kolena, and can be arbitrarily extended with additional metrics, plots, visualizations, and data.